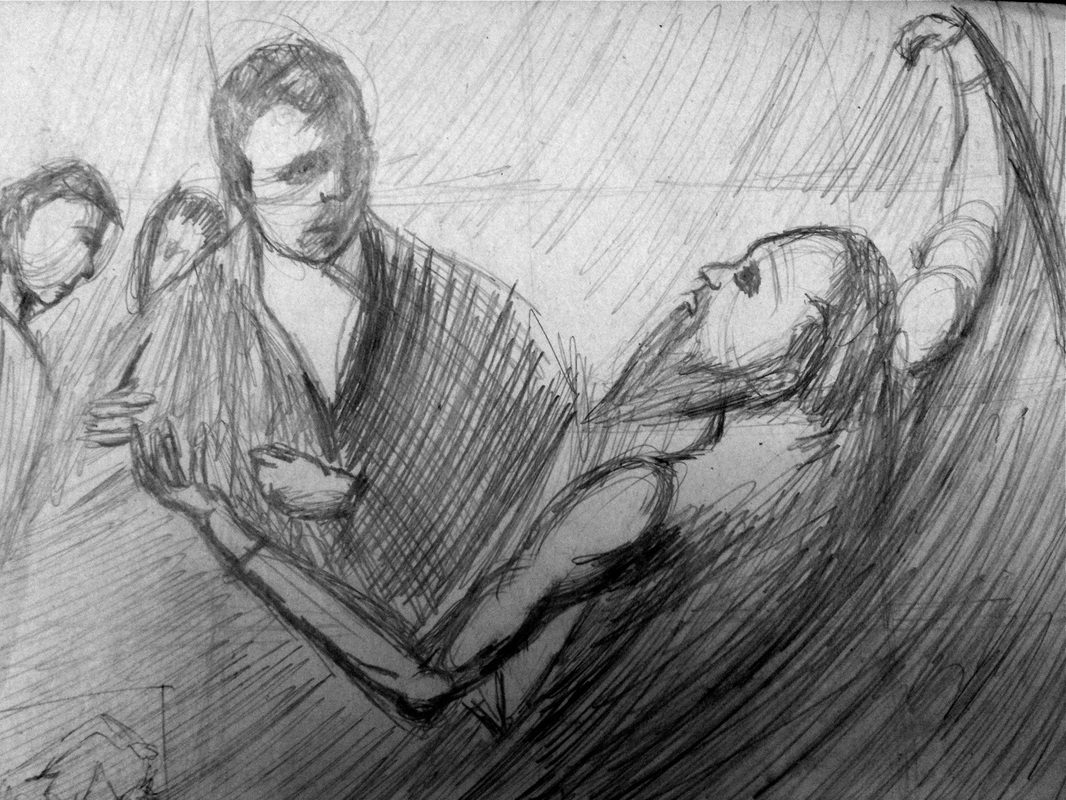
This is my finished sketch of the painting "Martyrdom of Saint Bartholomew". This is actually my second attempt at a finished sketch. The first one I was marrying the details and focusing too much on the small things. So for this one I ended tuning the picture of the painting I am recreating upside down to put my focus on the big picture and shades instead. Unfortunately my proportions were off even when I was using a grid. His near arm is not long enough. It doesn't meet the two sides of the paper that it should. I still am far from the quality I want in my final but for that I will spend much more time to make sure that all of the tones are how they should be if the painting was in black and white. But it is much improved from my thumbnail sketch. You can actually kinda see what is in the picture. When I did this sketch it bugged my how dark I made the Saint's eye so I will have to remember to lighten that up for my final piece. Also, much as I expected the hands I drew also didn't turn out, so I will be taking special care of those.
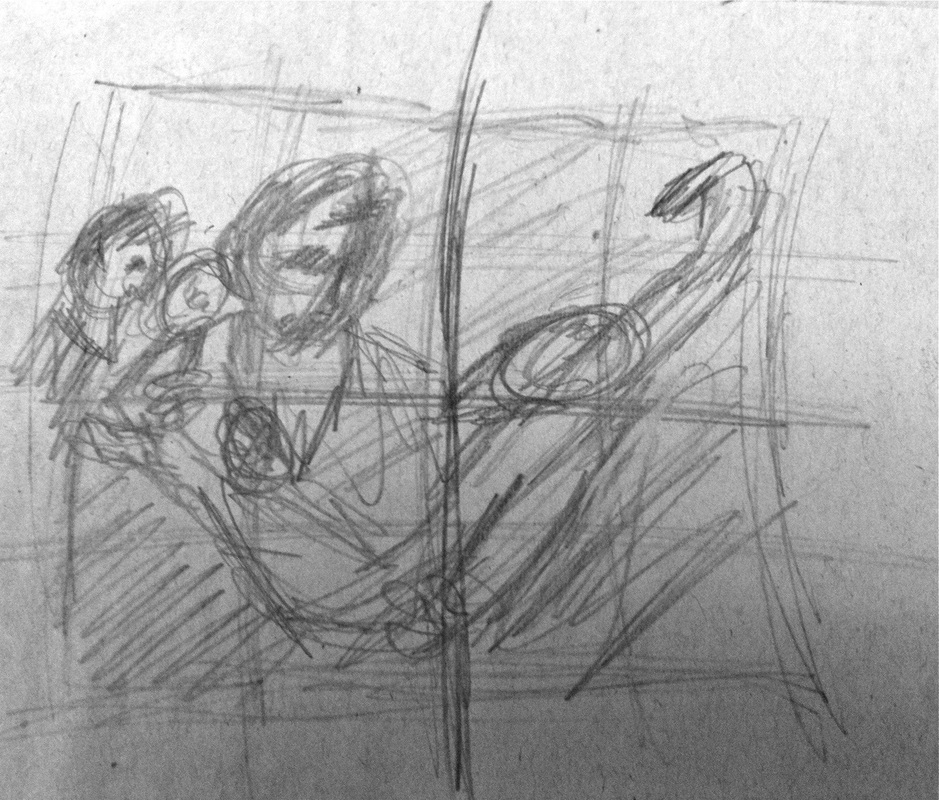
So this is a very, very rough sketch of my project. I was mostly concerned on the big shapes in the picture. I wanted to make sure that I would know the placement of the people in comparison to a different sized paper. I put next to zero detail in this sketch. Instead I roughly put in some of the different values. The darkest values will be in the corners, namely the bottom right side. Also the man who is apparently holding a knife will also be deep within the shadows making the main focus the man, Bartholomew. Obviously i will improve on this sketch by adding detail and darkening the shadows and making sure everything is in the right place. I was interested in what was happening in this painting so I looked up the word "Martyrdom". It turns up it means the death of a martyr, or someone who will die for a cause. So it turns out that this is a dark painting depicting the last minutes of St. Bartholomew, right before the shadow man with a knife kills him. Sad.
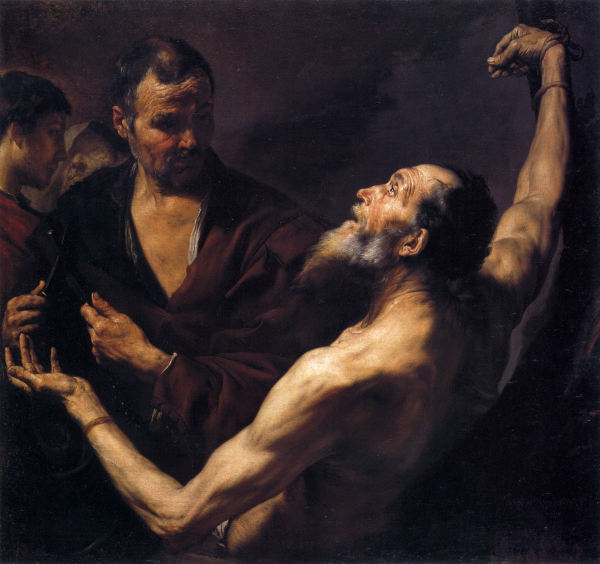
For our new assignment we have to take a painting and re-create it using charcoal. Then we have to do another charcoal drawing of the painting in an entirely different style. I chose to re-create "Martyrdom of Saint Bartholomeu" by Juespe de Ribera. The painting I am re-creating is down below. For me the hardest part of this assignment will be proportions. Firstly, the painting is square, but I am working off a rectangle piece of paper, so the re-creation is going have to be stretched. To help with this I divided the painting and my paper into 16ths. The painting also has two main figures, which will challenge me with their proportions. Also, they have hands. Hands are something I have been struggling with for a while. The painting is colored, but I will be working with the gray scale, so I will have to figure out what tones are the same and go from there.
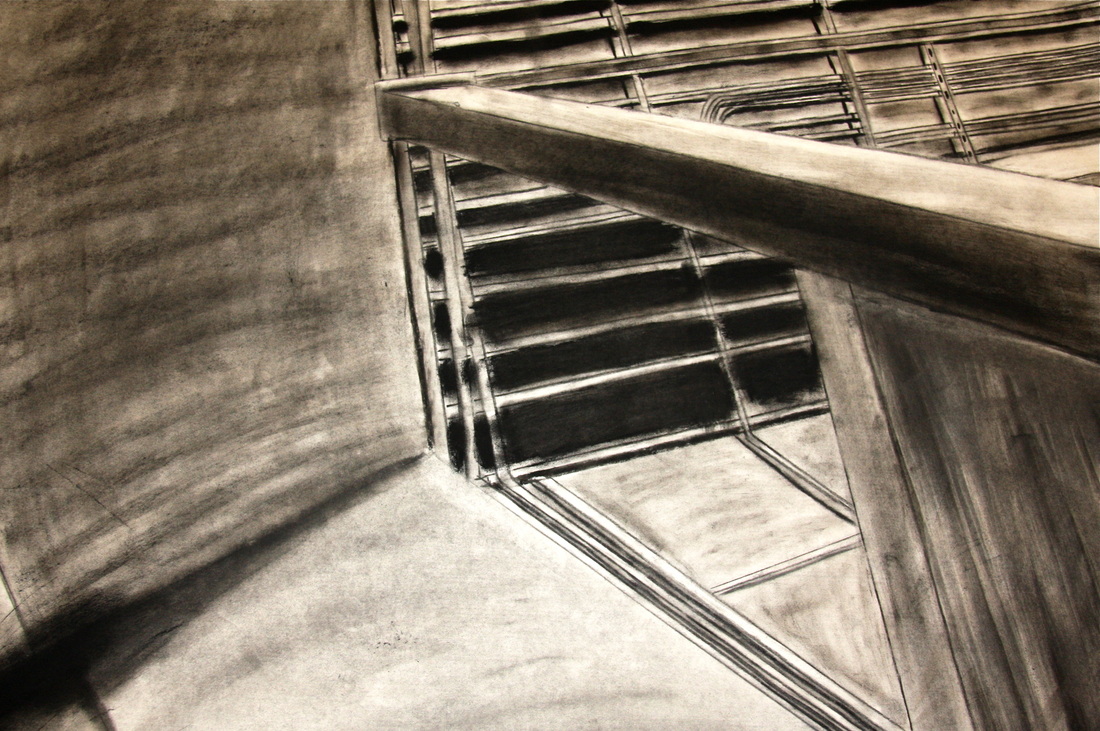
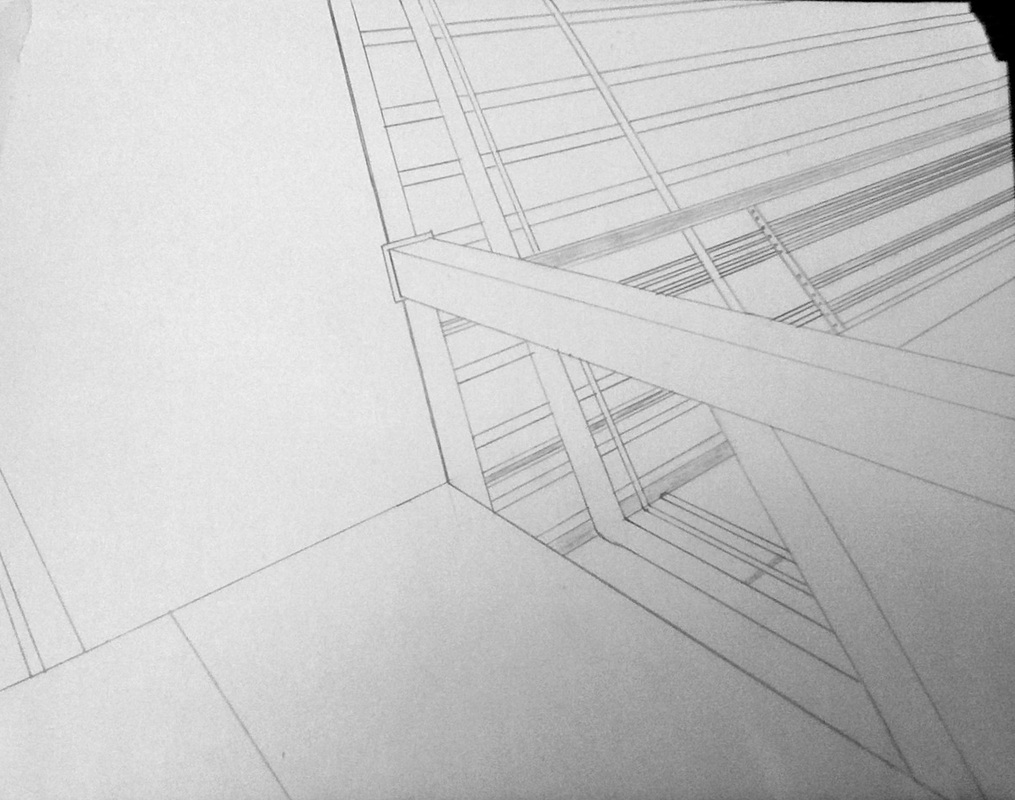
I finally finished my unusual angle drawing! I am very pleased in how it turned out. Although, this project was much more of a challenge than I thought it would be. I originally thought it would just be a simple, small three point perspective drawing. But it turns out our drawing had to be HUGE. On my small thumbnail sketch my vanishing points just barely fit the sheet of paper, so for my full size drawing two of my vanishing points weren't even on the table I was working on. And because there was no way my ruler would reach them I had to guess with the lines. This turned out to be a good thing because in the photo the lines do not go to a definite vanishing point. But then we also had to draw in charcoal! It actually is a very fun medium when your hair isn't in your way. But it was my first time using charcoal and I had no idea it gets everywhere; it is quite impossible to keep your paper free of fingerprints. The goal was to draw something ordinary in an strange way. I think I succeeded in this because by just looking at my picture it is difficult to tell what it is.
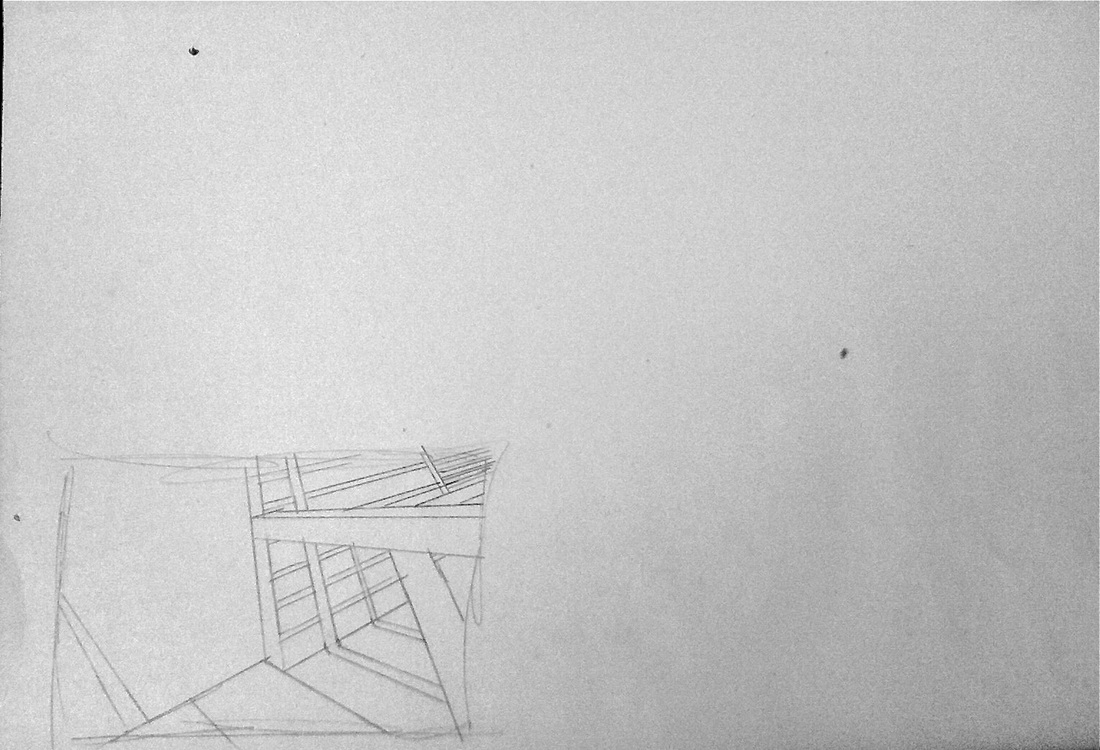
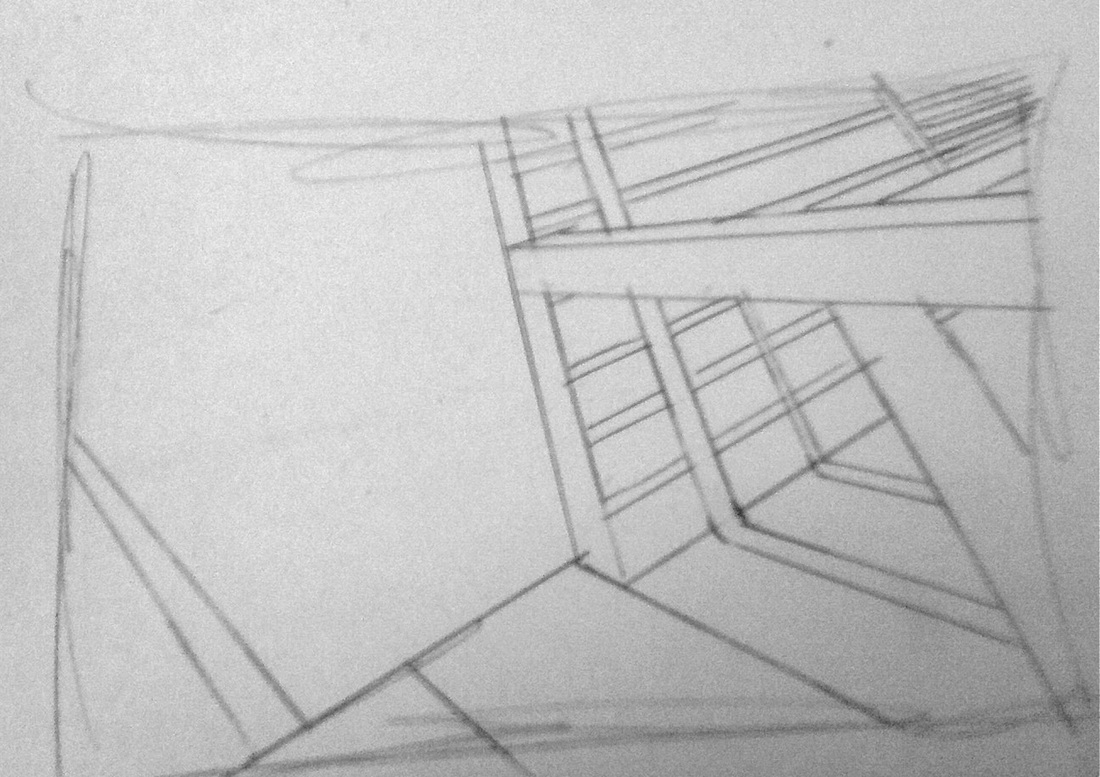
I re-did mt thumbnail sketch to make this bigger finished sketch. To get the vanishing points correct I taped the paper to a board and used tape to mark the different points. Unfortunately the paper is super thin and flimsy that the corners ripped when I tried to take off the tape. This sketch is better than my original drawing because I spent more time to make sure that the lines were precise. I also started to do some of the shading. To make sure my final is better I need to makes sure all of the lines match up and make sense. The two walls that make up DECA are separated by an overlapping beam. In my sketch the two walls actually would not line up. Also when the pipes bend to meet another wall, it doesn't look vary accurate at all, so I will have to fix that. In my final I will also have to put in shadows to show depth because right now all of the pipes look one dimensional, flat and boring.
For my unusual angle/ strange perspective drawing I decided to draw a corner of the court. Using my photo reference I traced the lines to see the general area of where my vanishing points should be. Because all the lines did not line up with a specific point I chose a general area where most of the lines overlapped. For this drawing I will be using three point perspective. At first I thought it would be really, really difficult to draw in three point perspective because I have never done it before, but it is actually super easy. In three point perspective I don't have to worry about vertical lines which never seem to turn out vertical. Instead every line goes to one of the three points. I can improve upon this sketch by adding all of the details and shading to show where shadows are. I really like this photo because it is really easy to see depth due to all of the overlapping lines of the beams and pipes. For my finished sketch i want to add all of the detail and work on the pipes that curve to be on two different walls.
For our next assignment we have to do another perspective drawng with a twist. It has to be from an odd angle so that the object it hard to recognize. This will aslo be a drawing around school, but this time it will be off of a photograph. The photo I chose is of a corner of a cealing going into the court, whis is upside down. But in the picture it is very hard to make out what it is. For this drawinf we can use any type of perspective; one point, two point, or even three point perspective. I am not sure exactly what kind of perspective I will be using for this drawing, that is to be decided later... The goals of this assignment is to use perspective to draw an unrecognizabe piece of a building because of the strange angle. I will know my drawing is successful when I show it to someone and they cannot place where the drawing comes from even if they pass that corner practically every day.
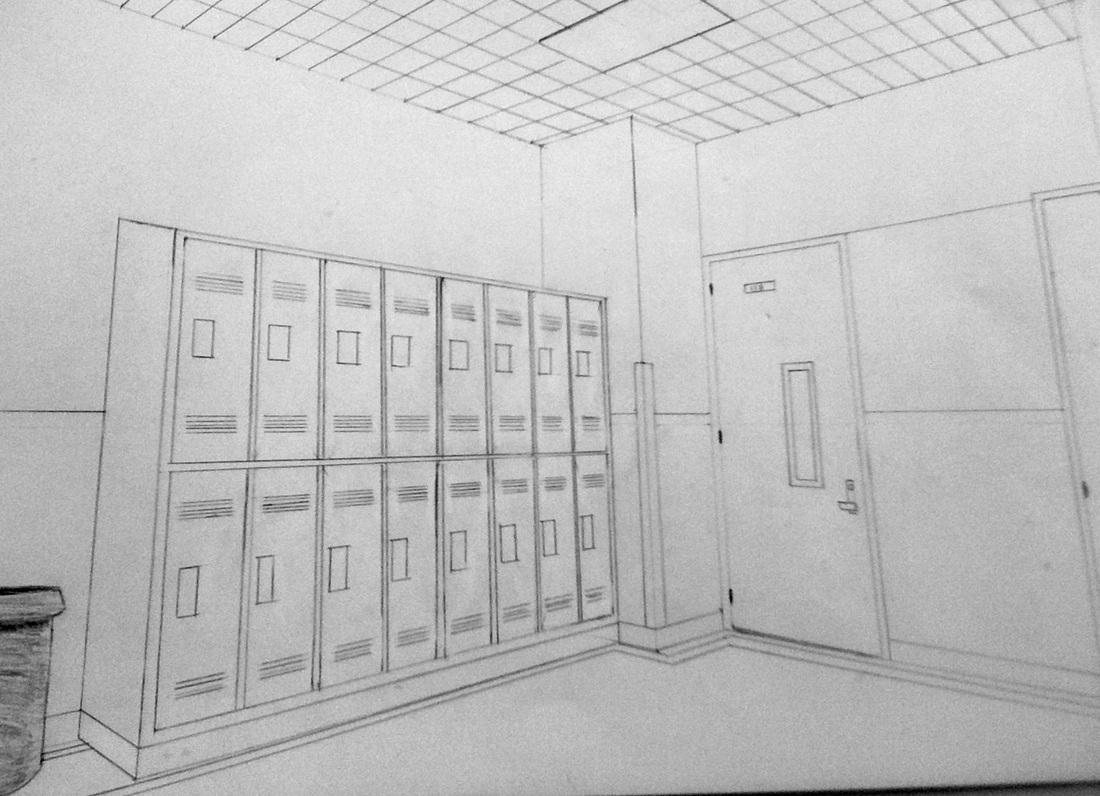
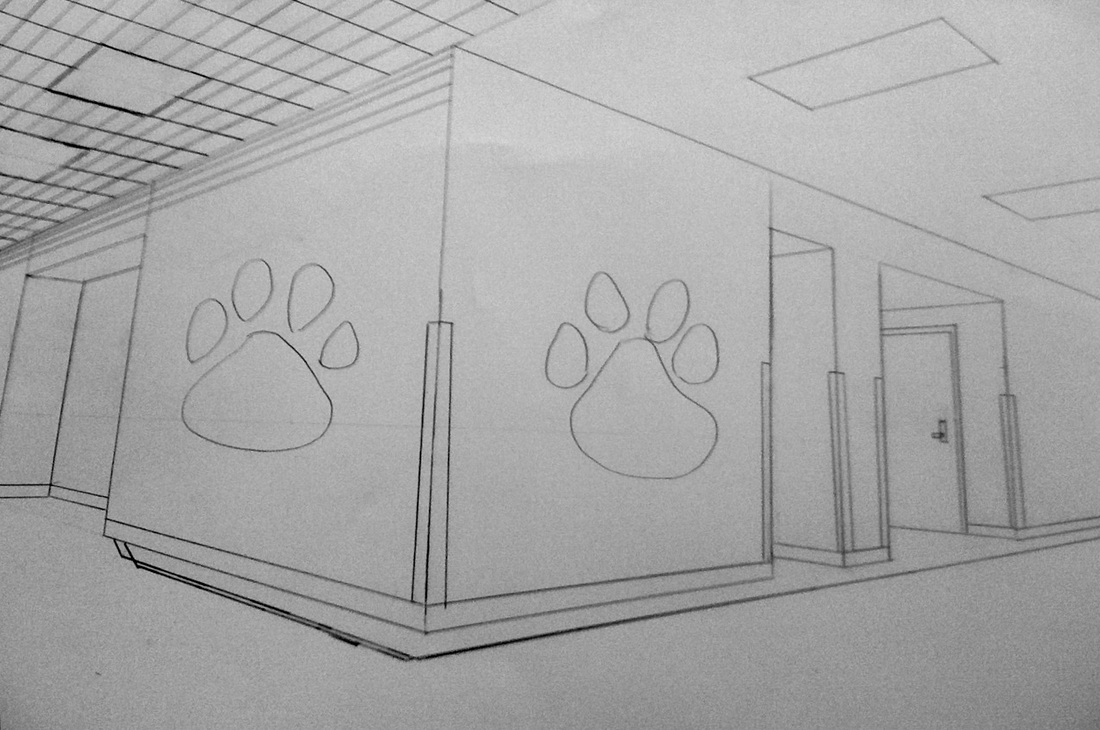
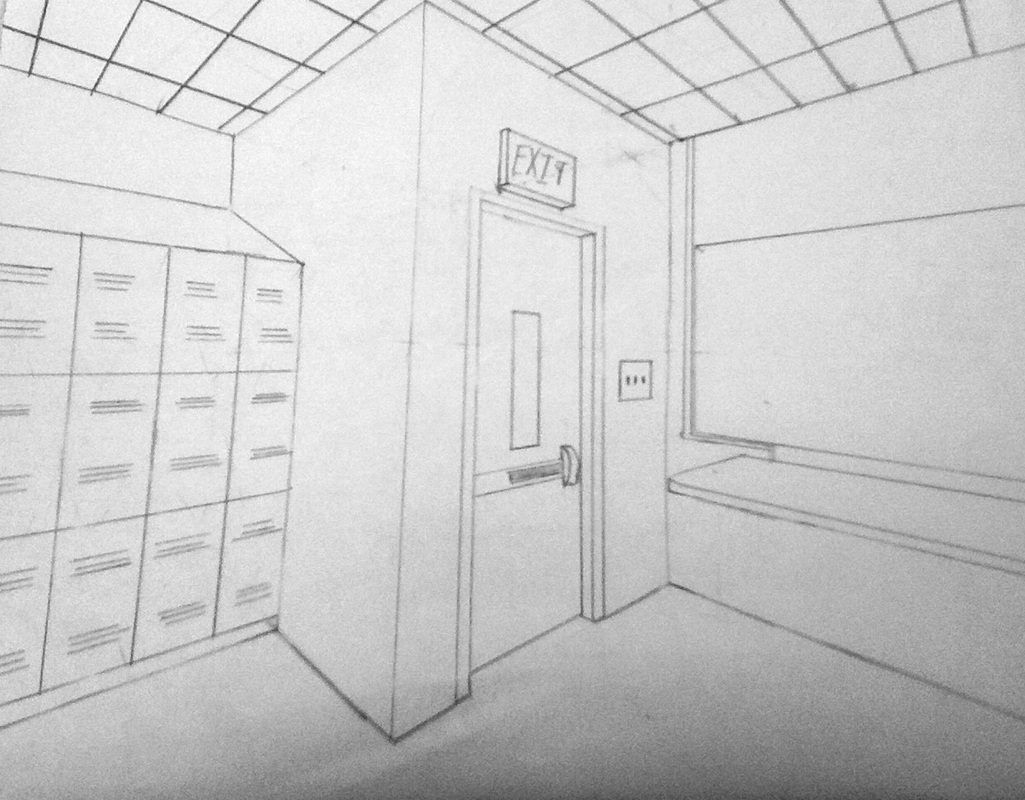
My first final is an interior two point perspective drawing. The goal for this assignment was to create a three dimensional space on a two dimensional plane. My drawing accomplished these goals by having every line be perfectly vertical or lining up with one of my two vanishing points. Also to make my drawing look realistic I used the pencil measuring technique to make sure that all of my objects were to scale. The hardest part of this drawing was to make a realistic looking garbage can that appeared off the wall. I had to draw and erase it many times before i was satisfied. Also there is a line on the wall almost directly on the horizon line, so when i drew it from wall to wall it looked out of place. My second final drawing is an exterior two point perspective drawing. I didn't like this one as much because the corner I was drawing was very boring. The hardest part was the paw paintings on each wall. I was able to draw this to scale by also using the pencil method. It was also difficult to draw the ceiling tiles to make them appear like they were getting smaller.
I expanded on my first thumbnail sketches to create two more finished and cleaned up sketches. The first one is an external drawing in two point perspective. I started by drawing an O, L, and U shape above and below the horizon line. I then proceeded to write out the rest of my name in two point perspectibe block letters. To do this I drew out the basic box and from there "cut" out the needed shape. My other sketch is an interior design in two point perspective. This one is of a corner of the art room. What I would do to make this sketch better is to make it seem like the table isn't floating. I am still trying to figure out how to draw table legs in two point perspective. For the next drawing I will do, for my final, is to go out into the hallways and do two point perspective drawings. Doing my classroom drawing will really help me with my hallway drawing because I practiced drawing lockers and deep door frames, which are plentiful in the hallways.
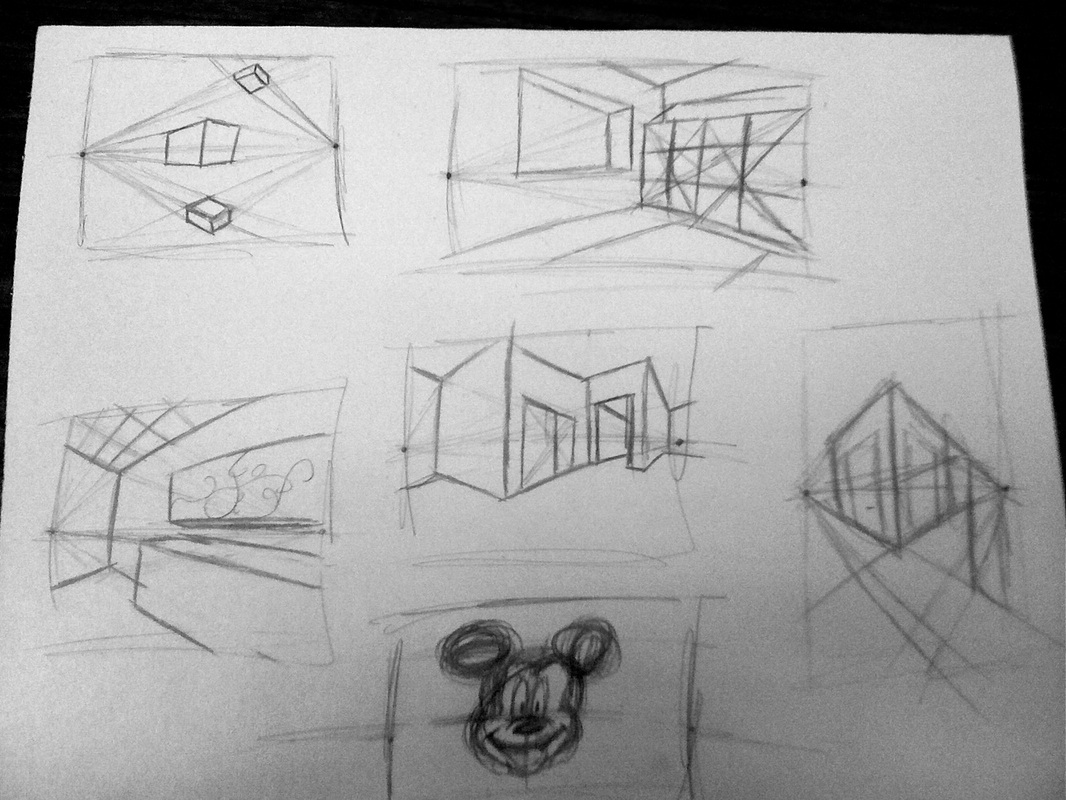
In my first thumbnail sketches I experimented with interior and exterior two point perspective. I was trying to accomplish the illusion of 3D space in a two dimensional plane. In my first thumbnail I worked on the exterior two point perspective by drawing three boxes one above, one below, and one in the middle of the horizon line. In the second drawing I did interior two point perspective. For this one I also drew lockers and a window so it looked like a corner in the art room. I did the same for my third design, but for this one I made cabinets and a counter. For this sketch I also attempted to draw ceiling tiles, but in forgetting how to do it in two point perspective... failed to put them in the correct plane. in next one I put interior and exterior two point in the same drawing. I also experimented with drawing hallways and doors, which I will be drawing in my final piece. The fifth drawing is another exterior drawing, but this one is the exterior of a building at crossroads. And my last sketch is the ever so famous Mickey Mouse.